SERVICES
LABORATORY APPLICATION
SERVICES
LABORATORY
APPLICATION
Extensive testing plays a crucial role in successful product development. During development, various prototypes and functional samples must be tested for their parameters and integrated functions, compared with each other, and evaluated. This requires the most accurate and reliable data to generate a good basis for decision-making.
Once the new product for series production has been found, test runs are again needed to define tolerances and limit values for subsequent quality checks. Already in this development phase, the later possibilities of product testing should be considered, and a holistic testing concept for the entire production chain should be developed.
We offer a whole range of solutions for your development process in the laboratory. Our laboratory applications range from simple, manually adjustable, and module carrier-based systems to cost-effective, fully automated multi-axis systems. Integration into your laboratory environment is also possible on request.
Our laboratory applications are used, for example, by manufacturers and suppliers of cockpit components, control panels, touch displays, and input elements.
The cornerstone for your successful laboratory testing process
- high-precision measurements with unique measurement technology / precision measurement systems for all haptic characteristics
- product flexibility and multiply deployable
- uncomplicated plug-and-play system (you only need a 24-volt power supply and Ethernet)
- including our intuitive control and evaluation software "PANOVOTEC Measurement Explorer"
- one software fits for all PANOVOTEC modules
- one-click real-time analysis of all parameters
- different export possibilities of the evaluations (tdms, txt, csv, xlsx PANOVOTEC report)
- industrial digital iOS / interfaces for uncomplicated connection of additional hardware
- optional with two additional differential analog inputs
- easy exchange of modules on the carrier (same housing shape and mechanical interface)
- transfer standards for comparison measurements and calibration
The cornerstone for your successful laboratory testing process
high-precision measurements with unique measurement technology / precision measurement systems for all haptic characteristics
product flexibility and muliply deployable
uncomplicated plug-and-play system (you only need a 24-volt power supply and Ethernet)
including our intuitive control and evaluation software "PANOVOTEC Measurement Explorer”
- one software fits for all PANOVOTEC modules
- one-klick real-time analysis of all parameters
- different export possibilities of the evaluations (tdms, txt, csv, xlsx PANOVOTEC report)
industrial digital iOS / interfaces for uncomplicated connection of additional hardware
optional with two additional differential analog inputs
easy exchange of modules on the carrier (same housing shape and mechanical interface)
transfer standards for comparison measurements and calibration
Overview of our haptics testing systems
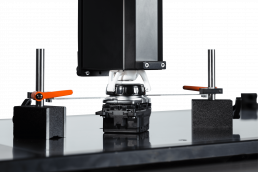
DHM (rotary haptics module)
for rotary switches
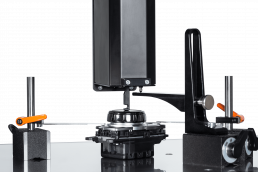
THM (key haptics module)
for switches, buttons, shift paddles
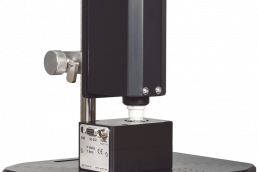
FFM (force feedback module)
for touch surfaces
- torque measurement with a bearingless sensor for highest precision
- radial compensation
- angle measurement (measurement of end stops or detents positions)
- different gripper variants
- measuring range ±100 mNm
- measuring accuracy 1.0 mNm
- force-displacement measurement
- glass scale for compensation of system stiffness
- measuring range ±40 N
- measurement uncertainty ±0.3% (related to measuring range)
- acceleration measurement
- adjustable dynamic impedance of measuring finger (mass and stiffness)
- force and displacement measurement
- measuring range force sensor ±15 N
- measuring range acceleration sensor ±50 g
- measuring speed z-axis 0.1 - 60 mm/s

DHM (rotary haptics module) for rotary switches

THM (key haptics module) for switches, buttons, shift paddles

FFM (force feedback module) for touch surfaces
- torque measurement with a bearingless sensor for highest precision
- radial compensation
- angle measurement (measurement of end stops or detents positions)
- different gripper variants
- measuring range ±100 mNm
- measuring accuracy 1.0 mNm
- force-displacement measurement
- glass scale for compensation of system stiffness
- measuring range ±40 N
- measuring uncertainty ±0.3% (related to measuring range)
- acceleration measurement
- adjustable dynamic impedance of measuring finger (mass and stiffness)
- force and displacement measurement
- measuring range force sensor ±15 N
- measuring range acceleration sensor ±50 g
- measuring speed z-axis 0.1 - 60 mm/s

DHM (rotary haptics module) for
rotary switches
- torque measurement with a bearingless sensor for highest precision
- radial compensation
- angle measurement (measurement of end stops or detents positions)
- different gripper variants
- measuring range ±100 mNm
- measuring accuracy 1.0 mNm

THM (key haptics m odule) for switches, buttons, shift paddles
- force-displacement measurement
- glass scale for compensation of system stiffness
- measuring range ±40 N
- measurement uncertainty ±0.3% (related to measuring range)

FFM (force feedback module) for touch surfaces
- acceleration measurement
- adjustable dynamic impedance of measuring finger (mass and stiffness)
- force and displacement measurement
- measuring range force sensor ±15 N
- measuring range acceleration sensor ±50 g
- measuring speed Z-axis 0.1 - 60 mm/s
The overall solution for your product development and quality assurance
The overall solution for your productdevelopment and quality assurance
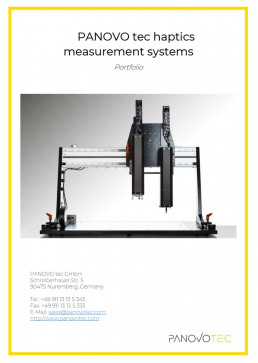
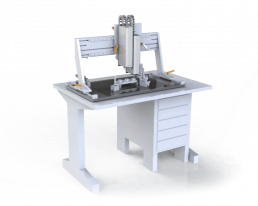
With our UDC (universal device carrier), which was designed for the use of haptic modules, an entire laboratory system can be set up quickly and easily.
The universal carrier can be equipped with up to three different test modules. These can all be controlled by the integrated network switch with just one network connection. Customer-specific test modules can also be adapted at request.
The DUT (device under test) can be securely fixed with the magnet-based clamping concept. The linear rail helps to position the modules precisely above the DUTs. This combination enables a smooth measurement process without interruptions.
On request, we can also supply the carrier with a grooved plate or other customer-specific requirements.

Calibration of the measuring equipment
The calibration of our test modules is possible at any time, quickly and easily, with our transfer standards. The transfer standards have excellent stability, accuracy and furthermore a very long service life.
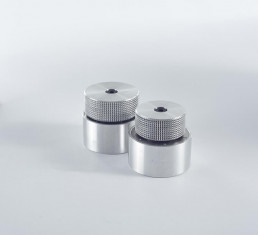
Torque transfer standard – Our torque transmission standard DTN38 with an accuracy of ± 0.05 mNm for the peak-to-peak torque MS-S and ± 0.1 mNm for the friction torque MR is suitable for our torque measuring system DHM3.
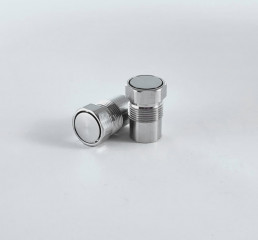
Key haptic transfer standard -Calibration of our THM key haptic system is possible with the THN16 key haptic transfer standard. The THN 16 has an accuracy of ± 0.01 mm for the actuation travel and ± 0.1 N for the force.
Optical inspection system for photometric analysis
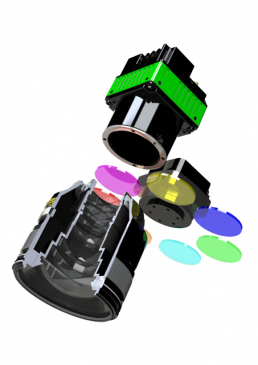
Our high-precision MSC8x8 – a multispectral camera with excellent measurement accuracy for color and luminance measurements – is ideal for automated optical inspection and lighting analysis in the laboratory. It can be used to perform all standard photometric and optical measurements.
Learn more about the MSC8x8 here.
For the adjustment and calibration of measuring cameras – such as our MSC 8×8 – we recommend our powerful luminance transfer standard. This consists of an integrating sphere with satellite sphere and a temperature-stabilized carrier board with up to six different LEDs. Our luminance transfer standard is characterized by highest homogeneity as well as stability of luminance and color.
Learn more about the luminance transfer standard LTN14 here.

We are the team that helps!
Send us a non-binding message or request using our contact form.
